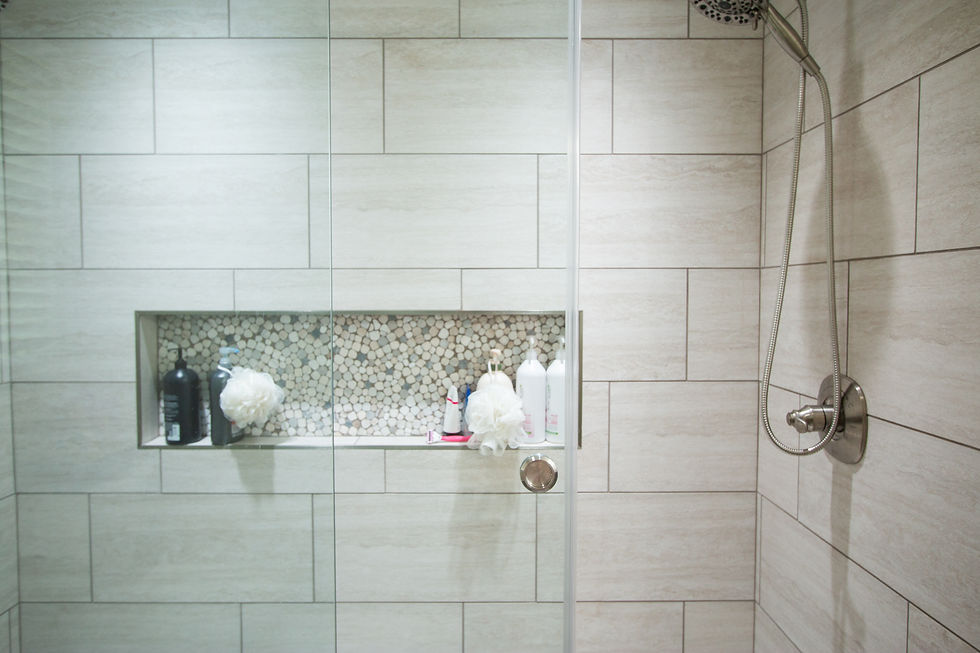
Say "Goodbye" to that old shower caddy and "Hello" to beautifully designed niches for all your bathing needs. Creating a functional and aesthetically pleasing shower space involves thoughtful design, and one key element often overlooked is the shower niche. Here's a complete guide to various niche designs, placement, and contrast options to elevate your shower experience.
Niche Styles:
1. Horizontal Niches: These niches run the length of the shower or tub. This creates a seamless look that complements the symmetry, providing ample space for all your toiletries.
Pro Tip: Make sure they are extra tall (14" or more) to give you enough space to fit all size bottles. Or, grab some fancy matching bottles for aesthetics like the ones photographed below.

Pro Tip: Consider using a natural or manmade stone or teak shelf to maintain a clean and simplistic look, minimizing breaks between tile shelf niches.


2. Stacked Square Options: For a modern touch, consider stacked square niches. Include a dedicated shelf for razors and soap bars, ensuring everything has its place while maintaining a sleek appearance.


3. Arched Niches: Infuse elegance with arched niches. This timeless design adds a touch of sophistication, breaking away from traditional geometric shapes.


4. Vertically Stacked Shelf Niches: Create a tiered effect with vertically stacked shelf niches. Perfect for organizing different-sized items and adding visual interest.

5. Rectangular Stacked Niches: For a clean and contemporary look, opt for rectangular stacked niches. The clean lines bring a sense of simplicity and order to your shower.

6. Arch and Rectangle Stacked Combination: Combine the best of both worlds with a fusion of arched and rectangular niches. This creative approach adds a unique flair to your shower space.

Placement Considerations
Center Long Wall: Perfect for symmetrical designs, especially in showers under windows.

Plumbing Wall: Be cautious with this option, as it can be tricky to incorporate around plumbing fixtures.

Adjacent to Plumbing Wall: Ensure water doesn't hit the shelves directly, preventing unwanted water collection. Also make sure your contractor knows to angle the shelf just so that the contents remain in but the water has proper drainage to not collect if it does intrude the niche.

Opposite Wall of Plumbing: While less practical due to stepping out of running water, it offers a functional layout to avoid water splatter inside the niche and is a great solution if you're not able to place the niche on the adjacent wall, as in the photo below where there was an issue with the thermostat location behind the long wall that could not be moved.

Tile Options:
Accent Tile: Infuse personality with accent tiles, adding a pop of color or a fun pattern like a hexagon or penny tile to bring the design of the room together.

Contrasting Base Tile: Create cohesion by extending the shower base tile into the shower niche. This also helps draw the eye around the room.

Classic Clean Look: Maintain simplicity by using the same tile or varying orientation slightly for a subtle contrast.

Your shower niche is more than a practical addition – it's an opportunity to showcase your style. Consider these design options and placement tips to transform your shower into a functional and visually appealing haven.
Ready to get started with your design and construction projects? Husky Builders is here to assist you. Contact us today to schedule your remodel or build, and get your business ready for customers.
*All photos and videos property of Husky Builders LLC

We are so grateful for the opportunity to educate and empower our clients. And, even more thankful to get to serve them from design to completion in residential and commercial needs for new construction and remodeling. If you're looking for a contractor, contact us for a quote.
Sign up for our newsletter {in the box below this blog}. And find us on social media here: instagram and facebook! Have questions? Contact us via email at info@huskybuilding.com.
We are Husky Builders


Comments